Key Insights
So, why haven’t all of your cookies turned out perfectly in the past? If your experience is anything like mine, here is what makes for a consistent cookie:
- Bread Flour: A little bit stronger cookie that is more resistant to collapse
- Very soft butter so it is thoroughly mixed into the sugar without dissolving it: Butter pockets would otherwise melt and cause ‘blow-outs’
- Mellon Baller/Cookie Scooper – for consistent shape and volume: it was never reasonable to expect your rag-tag team of cookies to all need the same cooking times
- Pre-Chilling: ensures consistency between batches and makes sure none of them go in too warm. If they are too warm, they will melt and flatten out before the outer shell gets a chance to crisp and hold its shape.
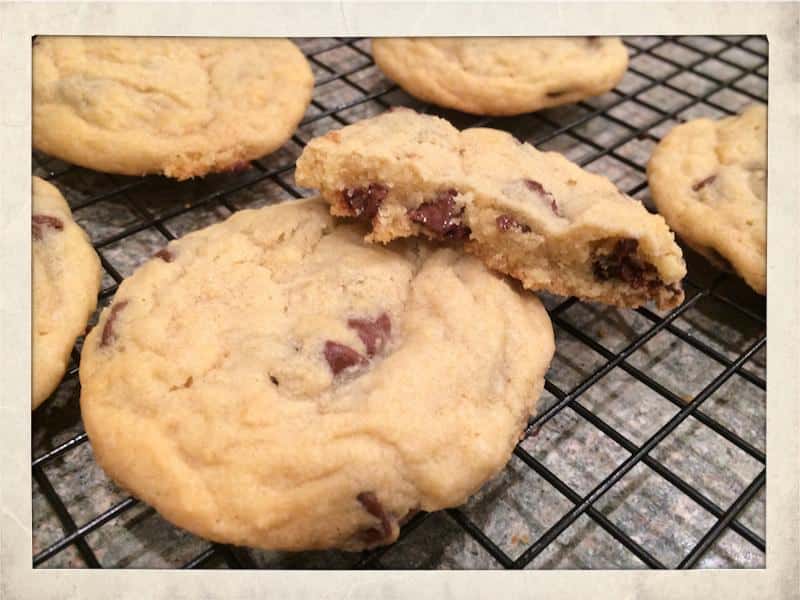
- They are done when still moist, but not wet, and still very pale, just lightly browned around the extreme edges. You’ll need to experiment to find the right indications of doneness that works for you, but be prepared to differentiate between ‘still wet’, ‘moist’, and ‘dry’. This transition period takes place over the course of less than a minute, so stay on your toes. I’ve found that using a baller for consistent scoop size, and pre-chilling, leads to a pretty consistent cooking time between batches, so once you find the right time for your oven and your tastes, it should work every time.
Special Supplies
The Game Plan
We’ll mix up dry stuff, wet stuff, and the combine. We’ll then scoop out very uniform balls and put them onto the pan let them chill in the fridge while we wait for the oven to warm. You can clean up while everything to avoid any downers when the cookies come out.
Ingredients (This is half-size of a typical cookie recipe)
- 8 Tablespoons unsalted butter, softened
- 50g sugar (normal white granular sugar)
- 100g light brown sugar
- 1/2 teaspoon vanilla
- 1 medium egg (about 53g)
- 165g bread flour
- 1/2 teaspoon baking soda
- 1/2 teaspoon salt
- 150g good chocolate chips
The Work
- Butter, softened
- Soft enough that you easily mix it into the sugar, but not so soft that the sugar dissolves.
- If you accidentally melt some of the butter, try throwing all of the butter into the freezing for a bit until it firms back up.
- I usually cut the cube into little chunks and nuke it for a few second and stir everything together.
- If the butter is a bit too hard, keep stirring until it softens. The big thing to avoid is little butter chunks that will later cause cookie blow-outs, like a mini volcano.
- white sugar
- 100g light brown sugar
- 1/2 teaspoon vanilla
- Egg
- Mix the egg into the butter and sugar mixture
- bread flour
- baking soda
- salt
Now, combine about half of this dry flour mixture into the wet mixture. Mix it by hand – just barely mixing enough to combine almost all of the flour. We really want to minimize the mixing here to avoid over working the gluten in the flour.
- chocolate chips
- plus the 2nd half of the dry ingredients.
Continue mixing by hand until most of it is combined. When in doubt, it is better to under-mix than to over mix – we don’t want that gluten to get overworked.
Place cookies on the tray – use a medium-sized mellon baller for consistent results. Avoid putting too many on there at a time and keeping them away from the edges – maybe about 7 cookies to a tray. Your scoops should be about the size of half a golf-ball.
I like a bigger cookie, and so I use a bigger baller. You can user a smaller baller, of course, but expect them to cook for less time.
Now, importantly, put the cookie sheet(s) with the scooped balls into the refrigerator for about a half hour. If you only have one cookie tray, then scoop any extra balls onto a plate. There really isn’t any need to cover the cookies here, unless your refrigerator is full of, say, stinky fish. Now is a good time to clean up your mess and give a ball or two to any junior helpers.
Cook for about 12 minutes at 350, or 15 at 325. If it looks wet, they still need to cook. After it no longer has any wet spots (moist is ok, wet will mean the cookie will collapse), then you can take them out immediately – or leave them in for another minute or two for a browner, drier, cookie. To each is own, here. When using a smaller baller, I had to adjust to 13 minutes at 325. Importantly, don’t overcook them. I find they’ll still look fairly pale in the oven when I take them out but still lightly browned at the edges. It might just be the yellowish light in my oven, but they looked undercooked until I got them out on the counter.
I really find the true test of doneness is the moist, but no-longer-wet look. This totally means you’ll need to stare at your cookies and first identify the still-wet look. They are worth obsessing over. Remember, it goes like this:
- Batter
- Still-wet
- no-longer-wet <— about a 30 second window – pay attention!
- over-cooked
- Family disappointment and quiet, but firm, judgment of you and your worth in the kitchen. Frantic searches for Mrs. Fields
After they are removed from the over, set the cookie tray on a rack for 2 minutes, then remove the cookies from the tray to the rack.
For best bliss, dunk into a cinnamon infused whipped cream.


